
I’ve had a set of SRM IC shrouds sitting in the basement for quite a while waiting for some attention. I have not used them because they don’t fit the SRM SMIC’s in their current state. I knew it was going to take a visit from Mr. Dremel to begin hoping to make them fit – and today I finally decided to try and get started on this undertaking.

The primary problem with the driver’s side shroud is that the right portion of the shroud extended about an inch out past the mounting tabs, and also beyond the core itself. This meant there was going to be a 1 inch gap along the right side of the core, and failing to secure the shroud to the core there was likely to leave additional large gaps elsewhere.
The best option I see is to cut the shroud in half, and then use rivets, or nuts & bolts, along with some epoxy adhesive, to reconnect the two halves in an overlapping manner that should eliminate the majority of the perimeter gaps.
The passenger side has an additional problem in addition to poor fitment.
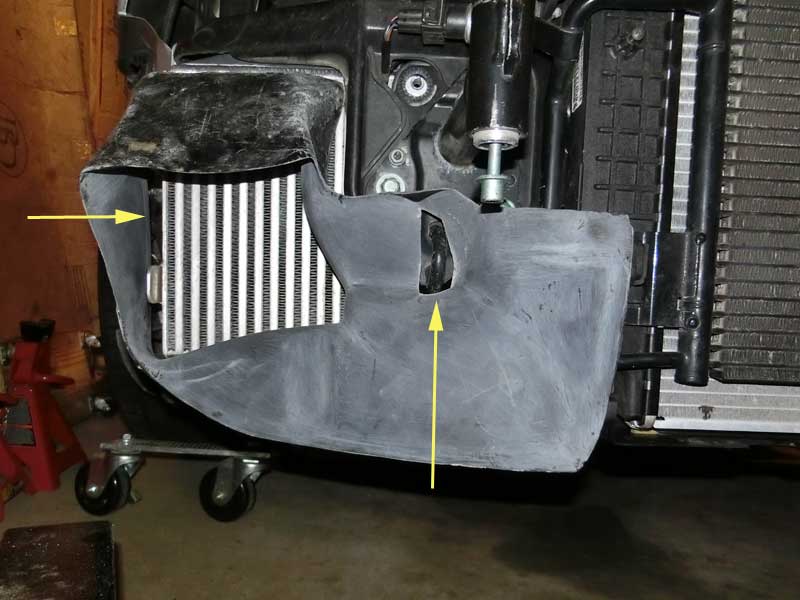
The cutout for the tow hook was not present, it was a solid piece. In the picture above the tow hook can be seen because I cut an opening for it to pass through.
On this side as well the shroud extends out past the mounting tabs leaving a gap along the edge of the IC core. I’m going to cut this shroud in half similar to the driver’s side, but with a good bit more curvature along the lower half of the shroud reconnecting these two halves in a clean manner is likely to prove challenging.
On a more positive note, the S4 is back up running again and after a couple of brief periods having the engine running I have not detected any leaks. My next endeavor will be to gather some K04 spool-up data in warmer temperature conditions and to log pre-turbine exhaust gas pressure.