80mm TB Bolt Test

As a follow up to the 80mm Throttle Body airflow test a good point was brought up about the detrimental affect that would be caused by having the bolt propping the throttle body valve open in the air stream.

My first idea for answering this question was to test the adapter plate alone and then place a bolt halfway across the opening to see what the affect was.  The hope was to get some idea about the scale of the change that could be caused by having the bolt in place.  As it turned out there was almost no measurable difference, while I suspect it did slightly impede airflow, it apparently was less than the naturally occurring variation in airflow through the bench.

Next I decided to try and devise a less intrusive prop to keep the throttle body valve open.  The result is shown below:

Harris Teeter card as throttle plate prop

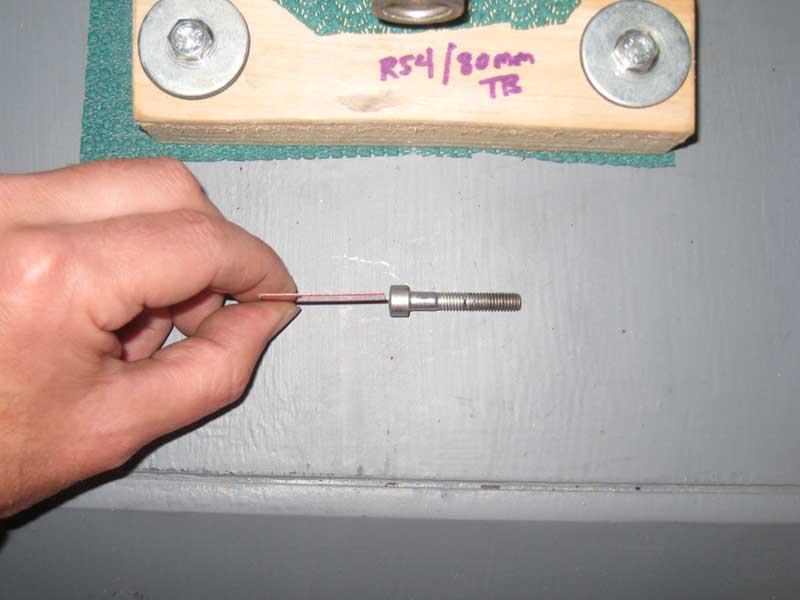
A Harris Teeter VIC card cut down to the appropriate size was rigid enough to hold the throttle plate open, yet as shown below, was much narrower than the bolt that had previously been used.

Harris Teeter card next to manifold bolt

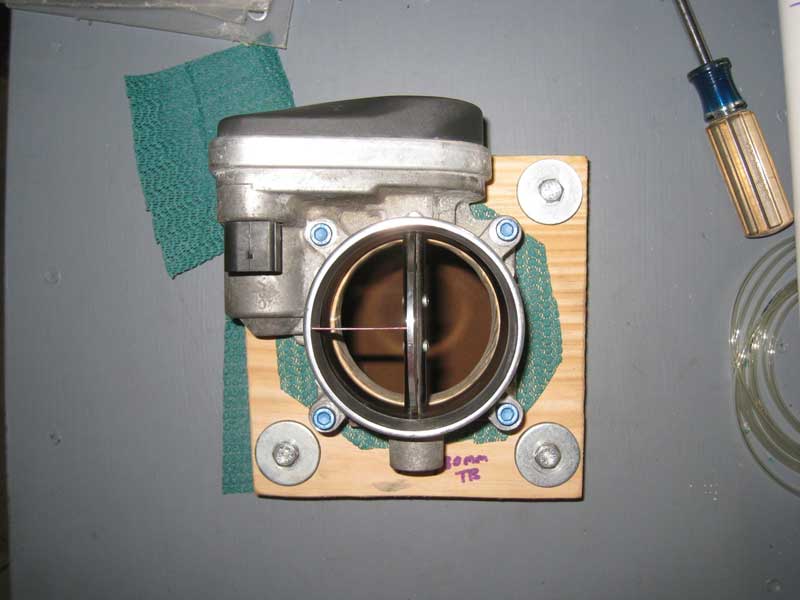
The thickness of the card is very small so that it should not cause much impediment to the air flow through the throttle body.  Below is a picture of the throttle body being propped up with the card section.

Harris Teeter card inside throttle body

The next step was to test the new prop out.  Actually the next step was to retest with the bolt in place to have a baseline reading for the days temperature and pressure conditions.

After the bolt was retested I tested with the card as shown above.  Note, when I have tested using the bolt I have placed it on the lower right hand side of the throttle body as viewed from above in the pictures.

I found that the card and bolt read within 6 CFM of each other, well within a reasonable margin of error for the readings.  As an aside, because the air flowing through the system is turbulent, especially just prior to the throttle body where two air streams collide, the airflow readings vary slightly as the air flow disturbances cause the pressure to rise and fall slightly.  For this reason I consider +/- 5 CFM to be a reasonable accuracy when reporting results.  To obtain a CFM value I observe the fluctuating reading  for several seconds and mentally estimate a center point, so the air flow value reported is not precise to a single digit value.

With the bolt and card reading very similar I was satisfied that the bolt was not causing an excessive amount of resistance.  I was puzzled by the fact that the narrower card had a lower airflow reading, no matter how small the difference.  So I placed the bolt on the top of the throttle body and retested.  This time the reading was about 17 CFM lower than the card in the same location.  Ah-ha, proof that the bolt causes more of an air flow drop than the card.

But I had not tested the card in the lower position, so I wondered if the placement lower in the throttle body made the difference, not the part.  I retested, this time with the card in the lower position, the results were 7 CFM less than with the card in the upper position.

Finally, I went and put the bolt back in the lower position and tested it again, recording a value only 3 CFM off from the first time, and well within my own margin for error, effectively reading the exact same as the first time.

All of this is illustrated below:

Bolt airflow results

So, what does it all mean?  Swirling, turbulent air flow has a lot more going on with it than a simple commonsense observation can describe.  My suspicion is that with the way the air flow is coming out of the up-pipes the interaction with the card and bolt props is much more complicated than it would appear.

In the end I feel the similar results achieved by using the card and the bolt means that the comparison with the stock throttle body, that does not require such props, is valid and that any gains that might be had by not having and prop at all within the 80mm Throttle Body would be small.


80mm Throttle Body

Going to be testing this 80mm Throttle Body shortly, connected via the 034 throttle body adapter boot to a set of JHM/ARD/034 style up-pipes.

80mm Throttle body and boot

Upon receipt of the throttle body I discovered that the operating gears are not accessible like they on the S4 throttle body, so my procedure for holding open the throttle valve was not going to work on this part.  In needed to place something into the throat of the throttle body that would hold it open and also not become dislodged with airflow passing over it.  Something small and lightweight would have the potential to get sucked into the flowbench vacuum chamber and through a motor.  I ended up using a bolt as can be seen below.  It’s round shape should hopefully not impede the airflow much and due to the flat surfaces on either end it remains firmly in place.  In addition, it’s heavy enough to not be sucked up into the air if it were to fall out.

80mm Throttle Body prop

The Results

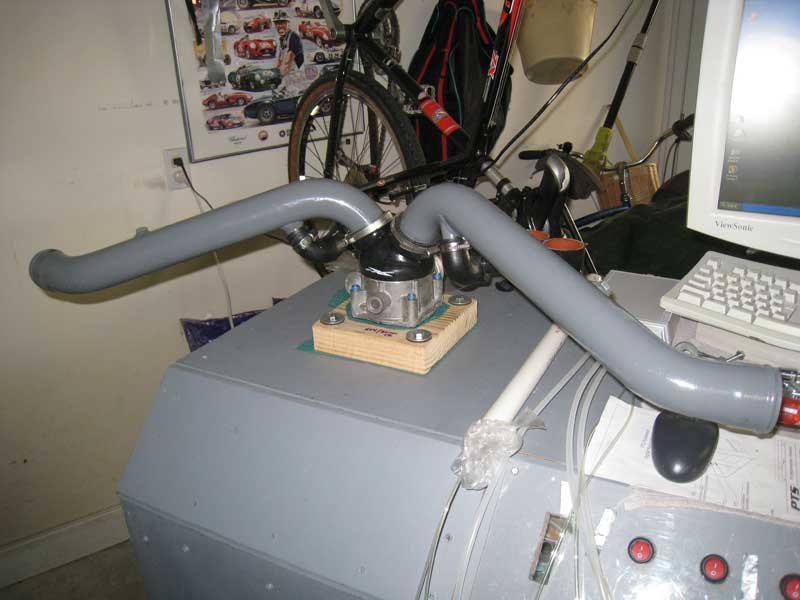
Attached the JHM/ARD/034 style (which I will refer to as typical aftermarket “TA” from here on) up-pipes to the throttle body boot and ran two tests, the first without the inlet hoses and the second with them.

80mm Throttle body and JHM uppipes on flowbench

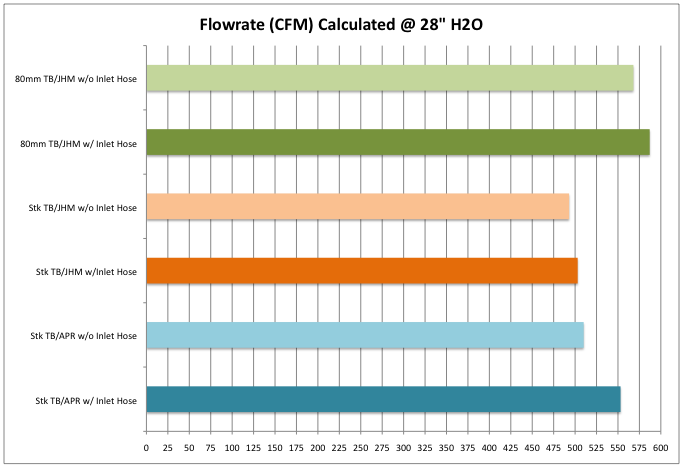
I also retested the TA up-pipes with the stock throttle and also retested the APR bipipe with the stock throttle body.  Due to the rigid construction of the APR bipipe is cannot be used in conjunction with the larger throttle body.  A keen eye will notice that since the last airflow tests of the throttle bodies the values for the APR and TA pipes with stock throtte body are slightly lower, this is due to recalibrating the bench and revising the correction factor applied to the results.  The relative performance between the test articles remains consist when making changes to the correction factor, but the absolute airflow reading will shift upward or downward.

Throttle body airflow test

* – Already breaking my just established convention, the chart above refers to the JHM/ARD/034 style up-pipes as JHM versus TA.

Not unexpectedly the 80mm throttle body enables a higher airflow for the test pressure, roughly 17% greater than the stock throttle body.

Interestingly the APR bipipe when used with the stock throttle body makes up some of that difference.  The 80mm throttle body outflows the APR bipipe and stock throttle body combination by only 6%.  Previously I theorized that the shape of the APR bipipe is what allows it to outflow the TA style up-pipie.

If it were possible to combine an up-pipe with the shallow radius curvature of the APR bi-pipe with the 80mm throttle body the results would likely exceed all that have been recorded here.

Thanks to infinkc from Quattroworld/Audizine for loaning the 80mm throttle body and adapter boot for this testing.


Modified RS4 Intake Manifold Test

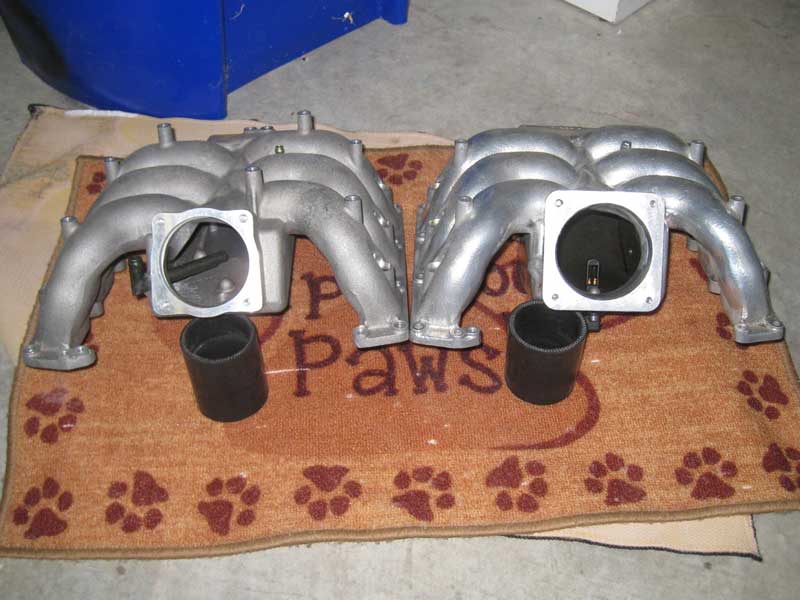
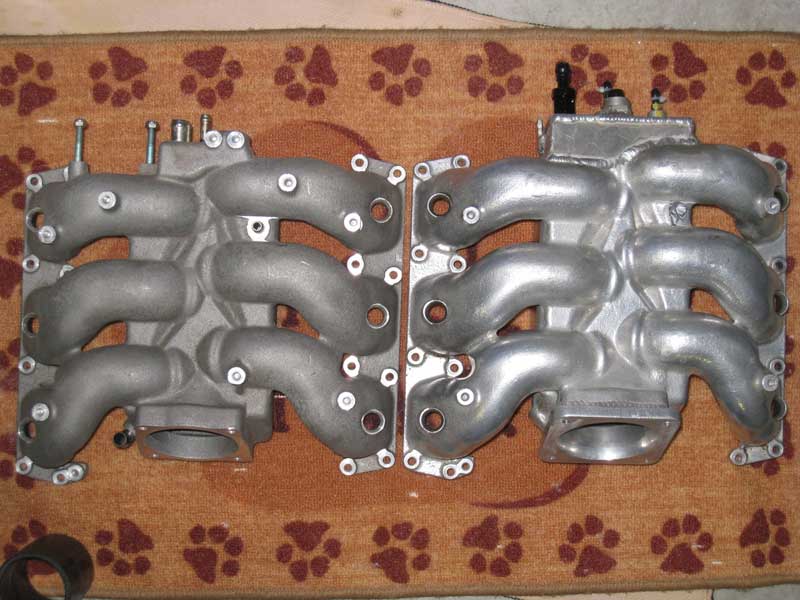
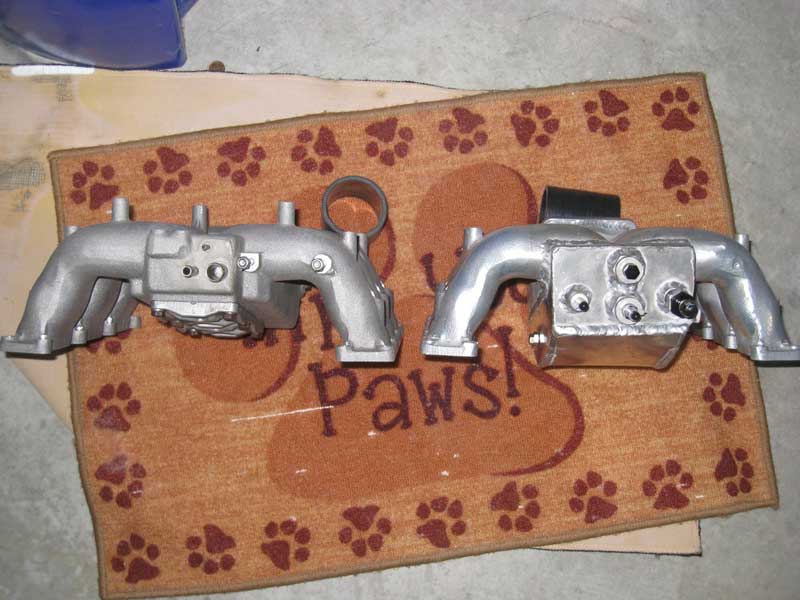
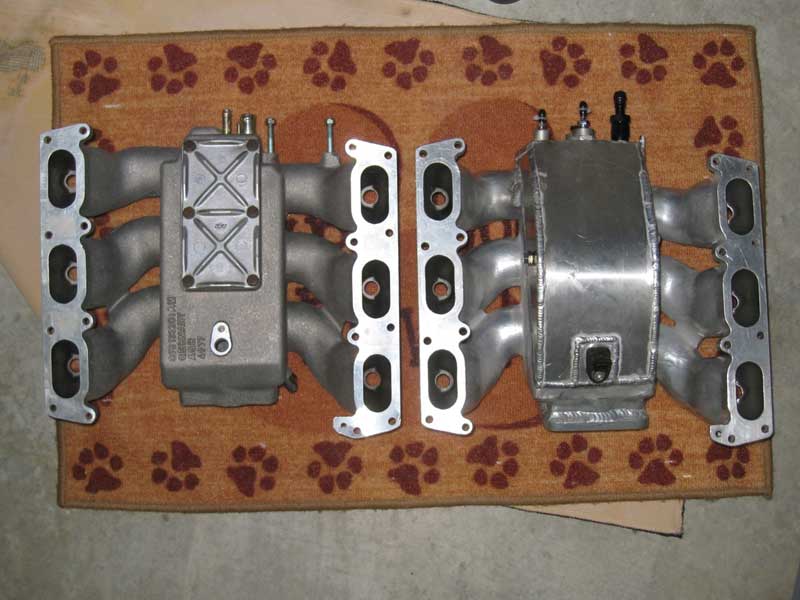
I put together another adapter today so that I could test out a highly modified RS4 intake manifold.  There’s some comparison pictures below showing this modified RS4 intake manifold alongside a stock RS4 intake manifold.

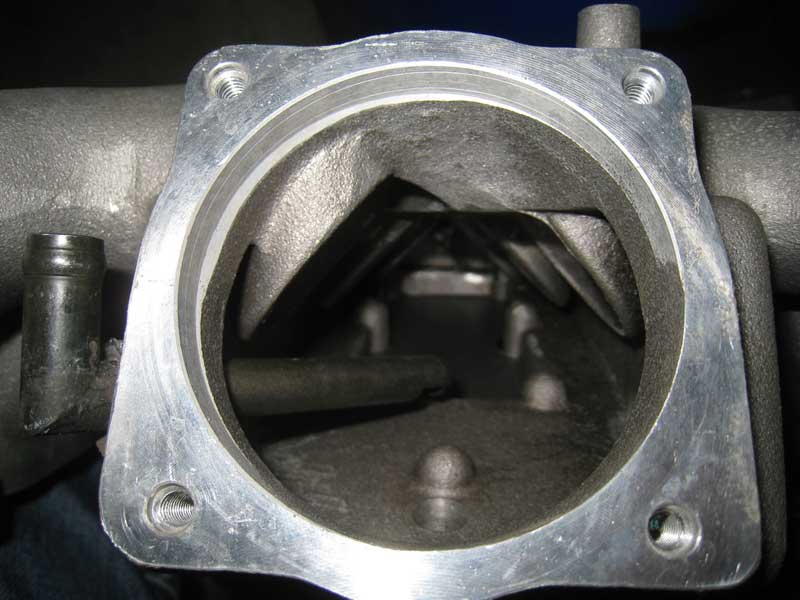
The most apparent differences between this modified RS4 IM and the stock RS4 IM are that the inlet where the throttle body mounts is larger, the adapter having holes positioned further out than the stock RS4 IM.  Interestingly the diameter of the entry area is nearly the same between the modified and stock RS4 IM’s, with only a 1mm difference, perhaps due to the porting that was done around the entry area.  It is evident that the surface of the entry area is much smoother on the modified IM than on the stock RS4 IM.  The plenum has been significantly expanded, and there has been some porting done to the trumpets inside the plenum as well as the inlet area.  The modified IM does not have the vacuum port near the left side of the entrance.

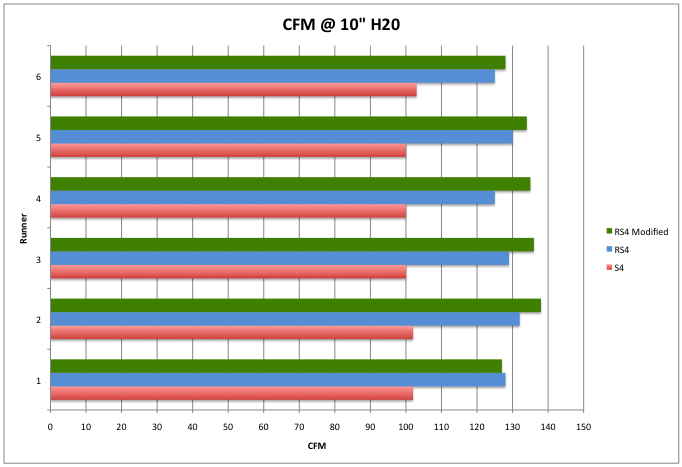
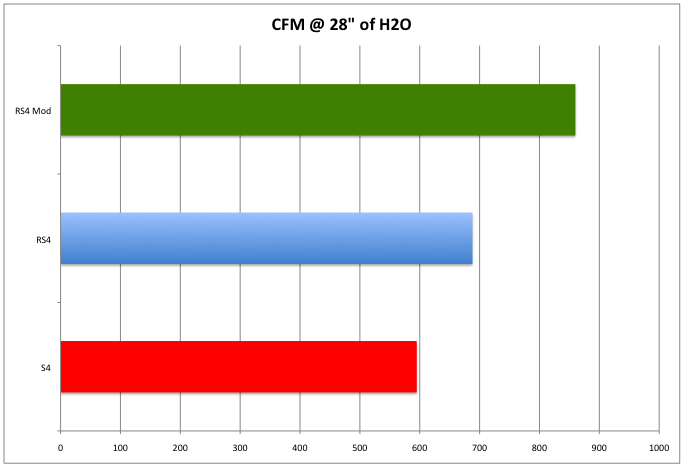
The results are interesting and pretty clearcut, though I don’t really know what they mean in terms of how these parts will compare once installed on a vehicle.

The comparison data is also shown between the S4 intake manifold that I use, which is the later design type, RS4, and modified RS4 intake manifolds.

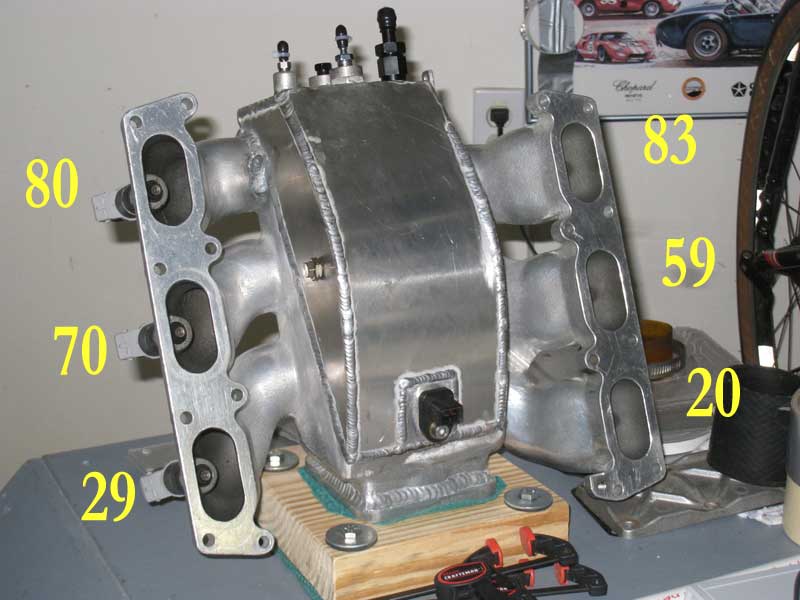
Modified RS4 intake manifold on flowbench
Exit velocity (FPS) measured at 3″ of H2O

At this point I’m unsure of what to make of the air velocity numbers.  The modified IM has outlet velocities higher than the stock RS4 IM, perhaps due to the slightly larger opening allowing more air in at the same test depression, but with the same size runners it becomes necessary for the air to exit faster.

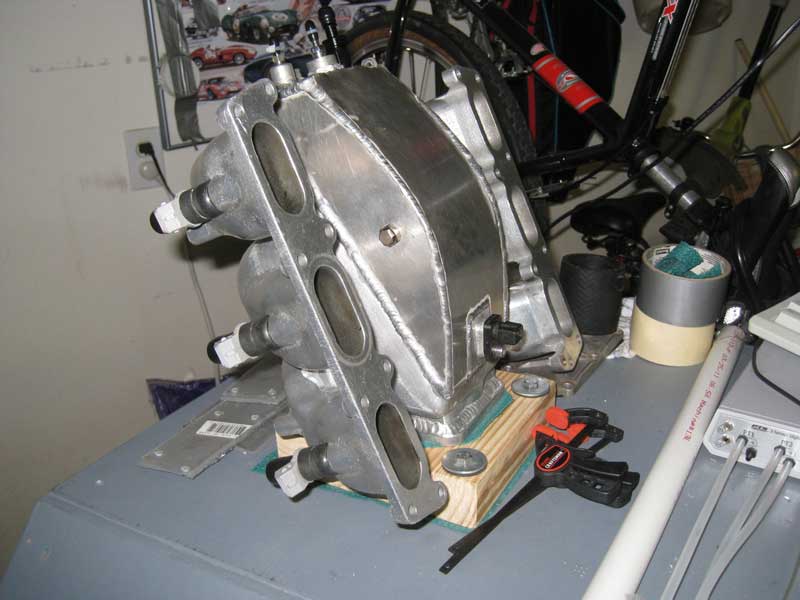
Modified RS4 intake manifold side shot

Modified RS4 intake manifold adapter
Modified RS4 Intake Manifold – Entry Diameter: 77mm


The Results

Intake manifold runner flow comparison

Intake manifold total airflow comparison
Intake manifold total airflow comparison – All runners open

Some pictures comparing the modified RS4 intake manifold to a stock RS4 intake manifold.

Stock RS4 intake manifold
Stock RS4 intake manifold – Entry Diameter: 76mm

RS4 intake manifold comparison one

RS4 intake manifold comparison 2

RS4 intake manifold comparison 3

RS4 intake manifold comparison 4

RS4 intake manifold comparison 5